Just like you'd protect your grill from the elements, your firepit needs covering too. Don't let it rust out or collect rainwater!
You're about to learn how to make a DIY firepit cover. It's a simple, cost-effective solution that'll extend your pit's life.
With the right materials, dimensions, and safety measures, you'll craft a cover that's tailor-made for your firepit.
Get ready to protect your backyard centerpiece and impress your friends with your handy skills!


Understanding the Importance of a Firepit Cover
 You mightn't realize it, but a firepit cover's more important than you'd think. This unassuming item extends your firepit's lifespan, shielding it from harsh weather elements. And don't think it's a one-size-fits-all deal. You'll need to adapt based on the changing seasons.
In the scorching summer heat, a cover prevents sun damage. When autumn leaves start to fall, it keeps your firepit leaf-free. Winter? Those icy conditions have nothing on your cover. It protects your firepit from rust and corrosion.


The Basic Materials Needed for a DIY Firepit Cover
 You'll need to pick out durable materials that can withstand the elements for your DIY firepit cover.
It's also crucial to have the necessary tools on hand to ensure a smooth and successful project.
Lastly, consider the overall cost of these materials to ensure your project stays within budget.
Choosing Durable Materials
When selecting the basic materials for your DIY firepit cover, it's crucial to choose durable options that can withstand the elements. Your main focus should be on material longevity and weather resistance.
Go for materials like heavy-duty vinyl or metal, which are known for their endurance. These materials can resist the effects of rain, wind, sun, and snow, ensuring your firepit cover lasts for many seasons.
Additionally, consider materials resistant to heat, such as stainless steel, to handle the residual warmth of the firepit.
Lastly, choose a design that fits your firepit and its surroundings. Remember, it's not just about making a functional cover; it's also about creating something aesthetically pleasing.
Essential Tools Required
To make a quality DIY firepit cover, there's a certain set of tools and materials you'll need. Start with the basic tools: a measuring tape for accuracy, a saw for cutting your chosen material, and a drill for securing pieces together. A durable fabric or metal for the cover is also essential. Don't forget a protective finish to increase the lifespan of your cover.
Tool maintenance plays a crucial role in ensuring your project goes smoothly. Keep your tools clean and sharp for accurate cuts and less effort while working. This also helps in keeping your project timeline on track.
Cost of Materials
Depending on the quality and type of materials you choose, the total cost for a DIY firepit cover can range anywhere from $50 to $200. It's crucial to set your budget allocation early on to avoid overspending while ensuring you get all the necessary materials.
For a basic yet durable firepit cover, you'd need a weather-resistant material like treated wood or metal, which can cost you around $20-$50.
Material sourcing is a significant factor to consider. You can save money by buying from discount or second-hand stores, or even repurposing materials you already have. Remember, high-cost materials don't always mean better performance.
You can make a functional and aesthetic firepit cover without breaking the bank. It's all about smart budgeting and sourcing.
Selecting the Right Dimensions for Your Firepit Cover
 Interestingly, you'll find that accurately measuring your firepit is the first key step in selecting the right dimensions for your cover. Use a tape measure to calculate the diameter and depth, ensuring the cover will fit snugly.
But dimensions aren't everything. You should also consider cover aesthetics and weather resistance. Choose a design that complements your outdoor space, and make sure it's made from a durable material that can withstand harsh weather conditions.
This will protect your firepit from elements like rain, snow, and intense sun.
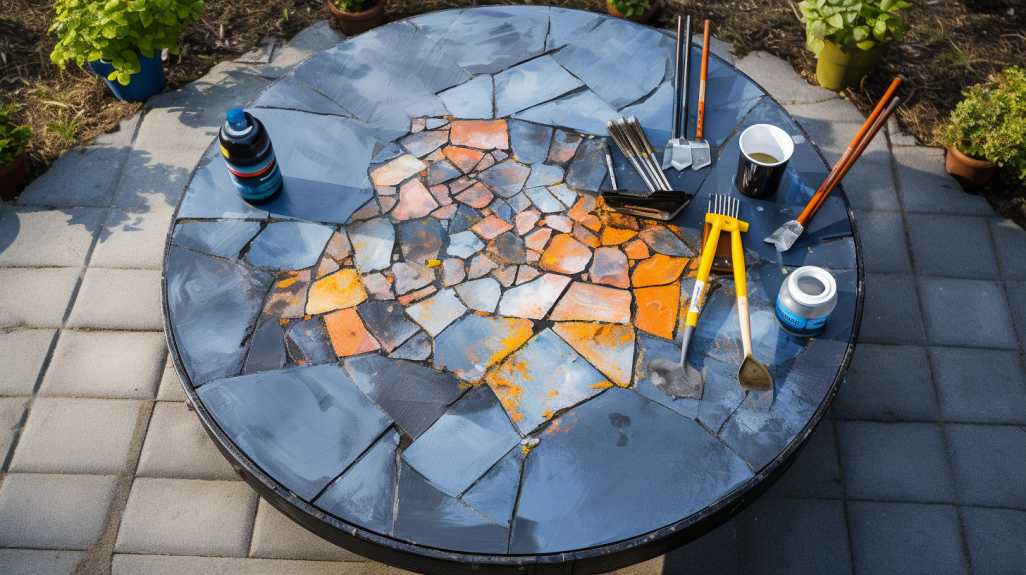
Step-by-Step Guide to Building Your Firepit Cover
 Start by gathering all the necessary materials and tools you'll need to build your firepit cover. Ensure that you consider both cover aesthetics and weather resistance when selecting your materials. Choose durable, yet appealing materials that can withstand outdoor conditions.
Next, cut your chosen material to your pre-determined dimensions. Follow this by attaching the pieces together to form the cover. Remember, the cover aesthetics should blend seamlessly with your outdoor space.
Afterward, apply a weather-resistant sealant to provide added protection. This step ensures your cover's longevity against adverse weather conditions.
Now, attach handles for easy removal and placement of the cover.
Finally, leave your firepit cover to dry thoroughly before using it.
With these steps, you'll have a firepit cover that's both practical and pleasing to the eye.
Safety Measures to Consider When Crafting a DIY Firepit Cover
 You'll need to bear in mind several safety measures when crafting your DIY firepit cover to ensure you're not putting yourself or others at risk. Ensure the cover aesthetics complement safety. It should be sturdy enough to withstand strong winds and prevent accidental removal. When handling materials, always wear gloves to protect against cuts or burns.
Weather resistance is another crucial factor. Your cover should be made from materials that can withstand different weather elements. Avoid flammable materials to prevent accidental fires. Also, consider the cover's weight; it should be heavy enough to stay in place but light enough to remove easily during emergencies.
Always remember, safety should never be compromised for the sake of design.
Personalizing Your Firepit Cover: Style and Functionality
 Now, let's put your unique stamp on your firepit cover.
Consider the material you'd like to use, keeping in mind that it shouldn't only be attractive but also durable and able to withstand the elements.
Incorporate design elements that match your outdoor decor, while ensuring that the cover is easy to use and maintain.
Choosing Cover Material
When choosing a cover material, it's crucial to consider both the style and functionality of your DIY firepit cover. You want to make sure your cover aesthetics align with your outdoor decor, but also ensure it can withstand the elements. Material versatility is key here.
Think about using metal, it's durable and can handle high temperatures. If you prefer a natural look, consider wood, but remember it needs to be treated for fire resistance. For a modern vibe, you might choose a synthetic material like vinyl, known for its weather resistance.
Incorporating Design Elements
Incorporating design elements into your DIY firepit cover isn't just about style, it's also a way to add a touch of your personality while maintaining functionality.
The design aesthetics you choose should reflect your personal taste and complement the surrounding outdoor décor. You may opt for rustic, modern, or a custom design that speaks to your unique style.
Material versatility plays a significant role in personalizing your firepit cover. Whether you choose metal, wood, or a combination of both, make sure it's durable and can withstand outdoor conditions.
For instance, you could use a weather-resistant wood like cedar and add decorative metal accents. Remember, it's not just about looking good – your cover should also serve its purpose of protecting your firepit effectively.
Functionality and Maintenance
You've got two key factors to consider in personalizing your DIY firepit cover: style and functionality, and balancing these can sometimes be a challenge. You want a cover that not only looks good but also serves its purpose efficiently. When thinking about functionality, consider the cover lifespan. Choose durable materials that can withstand extreme weather conditions and frequent use. Seasonal considerations are also essential. A cover that works great in summer mightn't be suitable for winter. Therefore, opt for a versatile design that can adapt to different weather conditions. Regular maintenance, such as cleaning and minor repairs, can also extend your cover's lifespan. Ultimately, a well-maintained, stylish, and functional firepit cover will enhance your outdoor experience.
Maintenance Tips for Your DIY Firepit Cover
 Surprisingly, maintaining your DIY firepit cover isn't as challenging as you might initially think. The key to cover longevity and weather resistance lies in routine care and attention.
Firstly, regular cleaning is essential. Use mild soap and water to rid the cover of dirt, grime, or bird droppings. Don't use harsh chemicals, as they can damage the material.
Secondly, ensure your cover is thoroughly dried before storing to prevent mildew and mold growth.
Lastly, inspect your cover periodically for any signs of wear and tear. Small rips or tears can be patched up quickly to prevent further damage.
Following these simple guidelines won't only prolong the life of your cover but also keep it looking its best for seasons to come.
Troubleshooting Common Issues With DIY Firepit Covers
 When you're tackling a DIY firepit cover project, it's common to run into a few snags.
From choosing the wrong materials to dealing with incorrect measurements or assembly challenges, these issues can throw a wrench in your plans.
Let's explore how to troubleshoot these problems and keep your project on track.
Material Selection Problems
During your process of building a DIY firepit cover, it's likely that you'll encounter some issues with material selection. One common problem is material sourcing. Where can you find quality, durable materials that won't break the bank?
A trip to your local hardware store or a quick online search can help you source the right materials for your project. Next, consider weather resistance. Depending on your location, your firepit cover may need to withstand a range of climatic conditions. Rain, snow, or intense sun can all damage the cover. Therefore, it's crucial to choose materials that are weather resistant.
Don't be disheartened if you encounter these issues, they're common and easily resolved with a bit of research.
Incorrect Measurements Issues
You'll encounter two main problems with incorrect measurements: either your firepit cover will be too large and won't fit snugly, or it'll be too small and won't cover the firepit entirely. Measuring errors can cause these issues and become a frustrating part of your DIY project.
But don't worry, correction techniques exist to help you solve these problems. If your cover is too large, consider adding extra material around the firepit's edges to create a tighter fit. Alternatively, if it's too small, you might need to start over with a new, larger piece of material.
Assembly Difficulty
Although you might've taken correct measurements, if you're finding the assembly process challenging, it's likely due to common issues like improper alignment or inadequate fastening.
Always double-check your alignment to ensure that the firepit cover fits well. If you're struggling with fastening, revisit your installation methods. You might be using the wrong tools or not applying enough force.
Remember, a well-fastened cover contributes greatly to cover longevity. On the other hand, a poorly fastened one can easily get damaged or blown away by wind.
If issues persist, consider seeking help from a professional or a handy friend. Like any DIY project, assembling a firepit cover can be tricky, but with patience and attention to detail, you'll overcome these common issues.
Cost Comparison: DIY Firepit Cover Vs. Store-Bought
 Comparing the cost of a DIY firepit cover to a store-bought one, you're likely to notice some significant differences. A DIY firepit cover might save you some money upfront, but you need to consider cover longevity. The materials you select for your DIY project may not withstand the elements as well as a professionally made cover, leading to replacement costs down the line.
Don't forget the DIY challenges either. The time and effort you put into crafting a cover could end up costing you more than anticipated. Conversely, store-bought covers might be pricier initially but they tend to last longer, offering better value over time.
In the end, balance your budget with your handyman skills and the desired durability.
Sharing Your DIY Firepit Cover Project: Inspire Others
 Once you've completed your DIY firepit cover, it's time to share your project to inspire others. Showcasing your work brings numerous project sharing benefits.
It provides a platform for knowledge exchange, where others can learn from your experience and you can gain insights from their feedback.
It fosters a sense of community, bridging the gap between novices and experts alike.
The importance of your project as an inspiration source can't be overstated. Just as you might've drawn inspiration from others, your project can motivate others to start their own DIY endeavors.
It's a cycle of creativity and innovation that starts with you.
Frequently Asked Questions
Can I Use a DIY Firepit Cover in All Types of Weather?"
Yes, you can. However, the cover's materials and its weather durability matter. Ensure it's made from sturdy, weather-resistant materials. It's best to remove it during extreme conditions for longevity.
What Kind of Paint or Sealant Is Best to Use on a DIY Firepit Cover?"
For maximum paint durability, you'd want to use high-heat resistant paint. As for sealants, opt for a weather-resistant type that can withstand harsh conditions. They'll ensure your project's longevity and effectiveness.
Are There Any Specific Tools That I Might Need to Make Adjustments to My DIY Firepit Cover Once It's Complete?"
Sure, you might need a couple of tools. For cover durability and material selection, a drill and some sandpaper could be handy. They'll help you adjust and smooth out any rough edges post-construction.
Is It Possible to Add Additional Features Like Handles or Designs to My DIY Firepit Cover?"
Absolutely, you can add handles or designs to enhance your cover. Depending on the cover materials used, you'll need appropriate tools for the installation process. It's all part of customizing to your liking.
Can I Use My DIY Firepit Cover as a Table or Seating Area When the Firepit Is Not in Use?"
Yes, you can, but tread lightly. Your cover material choices will dictate its dual use. Remember firepit safety precautions. Ensure the cover is sturdy, heat-resistant, and can withstand weight if used as seating or a table.
Conclusion
So, you've saved up to 60% by crafting a DIY firepit cover instead of buying one. Plus, you've gained a unique piece that perfectly fits your firepit and your style. Remember, regular maintenance will prolong its life.
That's smart, practical, and cost-effective.
Share your project and inspire others to take on this rewarding DIY task. After all, who wouldn't want to show off their savvy skills and creative prowess?


